Choose a subject, stabilize the phone and use the night-sky workflow built for your device. iPhone Night mode, Pixel Astro and Samsung Expert RAW do not share one universal set of controls.
As an Amazon Associate, we earn from qualifying purchases. The product below is an optional buying route for this guide.
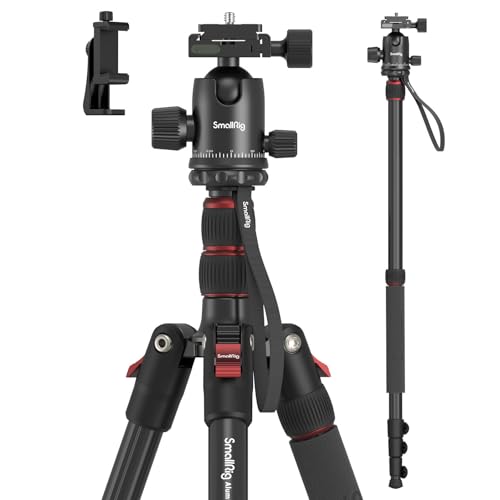
Steady camera supportSmallRig CT-10 tripod
Fixed-tripod nightscapes with your existing camera or phone.
Watch out: Check phone-clamp fit; this tripod does not track stars.
Check price on Amazon
A constellation above a campsite is a sensible first project. A detailed photograph of Saturn is a different optical and capture problem. Set a realistic goal before choosing an app or buying a telescope adapter.
Choose your phone workflow
| Phone | Start with | Detailed guide |
|---|---|---|
| iPhone | Main camera and supported Night mode | iPhone astrophotography by model and subject |
| Galaxy S24 Ultra or S25 Ultra | A reference Night photo, then supported Expert RAW Astro controls | Samsung Galaxy setup |
| Pixel 9, Pro or Pro XL | Night Sight and a stationary 1x Astro setup | Pixel 9 troubleshooting |
| Pixel 6 | Its supported Pixel Camera workflow | Pixel 6 guide |
For another device, check its manufacturer's current camera support. Do not install an unofficial camera package because a tutorial for a different model shows a feature you do not have.
Make one useful comparison
Find a safe dark location and compose a bright constellation with a stationary foreground. Clean the lens and keep direct lamps outside the frame. Secure the phone with no cable pulling on it.
Take a first image with the appropriate night mode, then a second supported variation without changing the composition. Inspect saved stars at the same enlargement. A brighter sky is not automatically more detail.
If both images are doubled, improve support. If a nearby object is sharp but stars are soft, recheck focus. If the sky is washed out, choose a darker direction, shorter capture or brighter subject. The iPhone field workflow illustrates this compare-one-change-at-a-time method, although its button instructions are specific to iPhone.
Decide whether your subject needs optics
A wide sky, trails and landscape need a broad camera view. An eyepiece adapter instead holds the phone against telescope optics for a close-up. It will not make an unsupported phone stable for a wide landscape.
For lunar work, begin with Moon exposure and framing and the smartphone telescope adapter guide. Measure both the phone and the eyepiece connection. Avoid buying an adapter based solely on the telescope's nominal barrel size.
Understand your software
A planetarium locates objects and previews the sky. A camera app records light. An editor changes saved files. A red display labeled night mode in a charting app is not an astrophotography exposure mode.
Use manufacturer instructions as the starting point: Apple Camera, Google Pixel Camera or Samsung Expert RAW. Then test the exact installed version before a long trip.
Plan a longer session only after the still works
Check battery, storage, weather and whether the app continues recording. Secure the charging cable and protect equipment from moisture. Try a short sequence first, then review it for focus drift, brightness changes and movement.
Use star-trail principles for a combined trail image, and the meteor-shower capture guide for unpredictable streaks. A time-lapse, a stack of stills and an ordinary video are different outputs.
Frequently asked questions
What should I buy first?
If movement is the problem, a secure clamp and stable support. If skyglow is the problem, a different direction or location may help more than equipment.
Which brand is best?
Compare the exact workflow and saved result you need. Different modes, conditions and editing can overwhelm a simple brand comparison.
Can a phone replace a dedicated astro camera?
It can be a useful entry point, but a dedicated optical and tracking setup serves different targets and levels of control. Start by learning what your existing phone does well.
Phone and tripod: a first session without a telescope
Use a phone and tripod for a wide sky scene, not a magnified view of a small galaxy or planet. Constellations, a bright star field or the Milky Way under a suitably dark sky are sensible subjects. A distant planet will usually be a bright point at ordinary phone-camera focal lengths. Digital zoom does not turn that point into telescope detail.
Start by checking the native camera features on your exact model. On a supported iPhone, use Night mode and place the phone on a solid support. On a supported Pixel, follow Google's Night Sight/astrophotography instructions and keep the phone stationary. A timer displayed by a computational camera can describe a multi-frame capture, not one uninterrupted exposure. Do not copy a manual shutter time from a different phone and assume the two modes work the same way.
Make the first attempt repeatable
- Choose a safe location with a clear sky view. Keep bright lamps outside the frame and avoid shooting through window glass. For a balcony, use the apartment sky-access checklist.
- Clean the lens gently and secure the clamp without pressing buttons. Check that the phone cannot fall out when tilted upward. A cable should not pull on it.
- Use the main camera at a supported setting rather than strong digital zoom. Let the appropriate night/astro mode activate, then use its timer if available.
- Do not touch the tripod during capture. Review a saved image, enlarging stars to distinguish movement from poor focus. Make one correction and take a comparison.
- Keep the original files. For an extended session, check available storage, battery, condensation and whether the app actually continues saving.
Should you stack phone photos?
First establish whether your camera has already combined multiple frames. Its finished night-mode image is not equivalent to a single RAW exposure. Additional stacking may be useful when you can export a consistent sequence, but the software must accept that file format and register stars properly. Some phone RAW formats are computational products too. Check the exact phone/app workflow rather than assuming every file labeled RAW behaves like a conventional camera exposure.
Try a small batch before committing a whole night. Inspect for doubled stars, changing brightness and smoothed detail. Star alignment and a stationary foreground need different treatment; a star-aligned sequence may blur the landscape. Stacking cannot repair stars that are already badly trailed within every image. For more manual control, the camera-and-tripod guide explains the next step without requiring a tracker.
Do not buy a paid camera app, telescope adapter or filter until you can name the problem it solves. A sturdier clamp helps movement; an app cannot remove a balcony roof, and a telescope adapter is for imaging through an eyepiece rather than photographing a wide star field. Start with equipment you have and one clear saved result.
Device instructions: Apple Night mode and Google Pixel Night Sight and astrophotography. Availability varies by model, lens and software version.