Quick verdict: the Celestron NexImage 10 is a simple high-resolution planetary camera for the Moon, Sun with a safe filter, Jupiter, and Saturn. It is easier than many astronomy cameras, but not the best choice for deep-sky imaging.
Is the NexImage 10 the right camera?

Celestron NexImage 10
The camera reviewed here: high-resolution lunar/planetary imaging with a simple Celestron setup.
Check Price on Amazon →The Celestron NexImage 10 is a 10.7-megapixel color CMOS planetary camera with USB 3.0 connectivity, 1.67-micron pixels, and 12-bit ADC. It fits any telescope with a standard 1.25-inch focuser and is designed specifically for imaging the Moon, planets, and Sun (with a proper solar filter). It is not a deep-sky camera.
At roughly $250, the NexImage 10 occupies an interesting spot in the planetary imaging market. It offers significantly higher resolution than Celestron's own NexImage 5 and NexImage Burst, but faces stiff competition from ZWO's ASI line - particularly the ASI224MC, which dominates community recommendations on forums like Cloudy Nights.
This review covers the NexImage 10's real-world performance, the lucky imaging workflow you need to get results from it, which telescopes it pairs best with, and an honest comparison against ZWO alternatives. If you are looking at your first telescope eyepiece camera, this is what you need to know.
Celestron NexImage 10 Specifications
| Specification | Detail |
|---|---|
| Sensor | ON Semi MT9J003 color CMOS |
| Resolution | 10.7MP - 3856 × 2764 pixels |
| Pixel Size | 1.67µm × 1.67µm |
| Sensor Size | 6.44mm × 4.62mm (1/2.3" format) |
| ADC | 12-bit |
| Shutter | Electronic rolling shutter |
| Exposure Range | 0.0001s to 10s |
| Connection | USB 3.0 |
| Mounting | 1.25" nosepiece barrel + C-thread |
| Filter | Built-in IR cutoff filter |
| Cable Length | 10 feet (3m) |
| Operating Temp | -40°C to +40°C |
| Included Software | iCap (Mac/Windows), Registax |
| Body | Aluminum |
What Can You Image with the NexImage 10?
The NexImage 10 is a solar system camera - it is designed for bright, nearby targets. It performs well on objects that are small and bright enough to benefit from high frame rates and lucky imaging (stacking the sharpest frames from a video). Here is what it handles:
The Moon
This is where the NexImage 10 shines brightest. The Moon is large, bright, and doesn't require long exposures. At full 10.7MP resolution, the sensor captures sweeping mosaics of the lunar surface with impressive crater detail. At reduced resolution (1280×960 or 640×480), higher frame rates let you stack hundreds of frames for razor-sharp results. The Moon is the ideal first target for learning the astrophotography workflow.
Planets
Jupiter, Saturn, and Mars (at opposition) are the three prime planetary targets. The camera captures enough detail to resolve Jupiter's cloud bands and the Great Red Spot, Saturn's rings and Cassini Division, and Mars' polar caps and dark surface features. Venus shows clean phase detail. For context on what different apertures reveal on planets, see our guide to planets through a telescope.
The key constraint on planetary detail is not the camera - it is your telescope's aperture, the atmospheric seeing conditions, and your image scale (whether the camera's pixels match the resolution your telescope can deliver).
The Sun (with proper filtration)
With an appropriate full-aperture solar filter (white-light or hydrogen-alpha), the NexImage 10 can image sunspots, granulation, and prominences. Never point any camera or telescope at the Sun without a certified solar filter. For more on solar filtration, see our telescope filter guide.
What it cannot do
The NexImage 10 is not built for deep-sky objects - galaxies, nebulae, and faint star clusters. These targets require long exposures (minutes, not milliseconds), a cooled sensor to reduce thermal noise, and an equatorial mount for precise tracking. If deep-sky imaging is your goal, you need a different class of camera and a different mount setup. See our beginner astrophotography equipment guide for deep-sky options.
What Image Scale Does the NexImage 10 Produce?
This is the question most buyers skip - but it determines whether the NexImage 10 will perform well with your telescope. Image scale tells you how many arcseconds of sky each pixel covers. The formula is:
Image scale (arcsec/pixel) = (pixel size in µm × 206.265) / focal length in mm
For the NexImage 10's 1.67µm pixels:
| Telescope | Focal Length | Image Scale | Sampling Match |
|---|---|---|---|
| Celestron NexStar 5SE | 1,250mm | 0.276"/px | Slightly oversampled - good |
| Celestron NexStar 6SE | 1,500mm | 0.230"/px | Oversampled at f/10 - add Barlow |
| Celestron NexStar 8SE | 2,032mm | 0.170"/px | Well matched for planets |
| Celestron CPC 800 | 2,032mm | 0.170"/px | Well matched for planets |
| 8" f/10 SCT + 2x Barlow | 4,064mm | 0.085"/px | Excellent for high-res planetary |
| 80mm f/5 refractor | 400mm | 0.862"/px | Undersampled - too wide for planets |
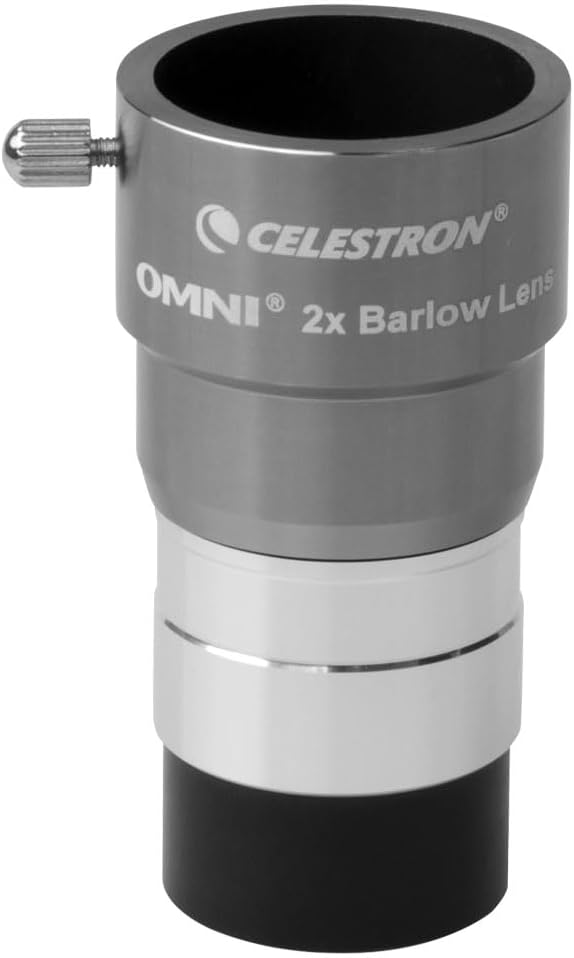
Celestron Omni 2x Barlow Lens
Useful for pushing f/10 SCTs toward the effective focal ratios planetary cameras need.
Check 2x Barlow →The takeaway: The NexImage 10's tiny 1.67µm pixels pair best with long focal lengths - f/10 Schmidt-Cassegrains like the NexStar 6SE or 8SE, ideally with a 2x or 3x Barlow lens to push the effective focal ratio to f/20 or f/30 for planetary work. On short focal length refractors, the small pixels undersample the image and you lose the resolution advantage.
For a broader overview of how magnification math works, see our telescope magnification guide.
How to Use the Celestron NexImage 10: The Lucky Imaging Workflow
Planetary imaging is fundamentally different from deep-sky astrophotography. You don't take a single long exposure - you shoot a high-frame-rate video and then stack the sharpest frames. This technique is called lucky imaging, and it is how every good planetary photograph is made, from amateurs to professionals.
Step 1: Hardware Setup
Screw the 1.25" nosepiece barrel onto the NexImage 10 and slide it into your telescope's focuser (the same place your eyepiece normally goes). Connect the USB 3.0 cable to your laptop. If your laptop only has USB 2.0, the camera will still work but frame rates drop significantly - USB 3.0 is strongly recommended.
If you need help physically connecting a camera to a telescope, see our how to attach a camera to a telescope guide.
Step 2: Capture Software
The NexImage 10 ships with Celestron's iCap software on CD. Download the latest version from Celestron's website - the CD version is often outdated. iCap is functional but basic.
Better alternatives (all free):
- FireCapture - the community standard for planetary capture; supports ROI (Region of Interest), histograms, gain/exposure control, and SER/AVI output
- SharpCap - feature-rich with a free tier; includes polar alignment tools and live stacking
- oaCapture - lightweight open-source option, particularly good on macOS
Any of these will let you control gain, exposure, frame rate, and ROI size. Set the ROI to crop tightly around your target planet - this dramatically increases your frame rate.
Step 3: Capture the Video
Point your telescope at the target planet. Focus carefully - this is the single most important variable. Use a Bahtinov mask or focus manually by watching the live feed and adjusting until surface detail snaps into view.
Set your exposure short enough that the planet is well-exposed but not blown out. For Jupiter at f/10, typical settings are 10–30ms exposure, gain at 50–70%. Record 60–120 seconds of video in SER or AVI format. At 640×480 with the NexImage 10, this captures 5,000–11,000 frames.
Step 4: Stack the Best Frames
Open your video in AutoStakkert!3 (free). The software analyzes every frame, ranks them by sharpness, and stacks the best percentage (typically the top 10–25%). Output is a single TIFF with dramatically more detail than any individual frame.
Step 5: Sharpen and Process
Open the stacked image in Registax 6 (free) and apply wavelet sharpening. This pulls out planetary detail - cloud bands, ring structure, surface features - that was present in the data but hidden by atmospheric blur. Final color balance and levels adjustments can be done in Registax or any image editor.
The entire workflow is: Capture (FireCapture) → Stack (AutoStakkert) → Sharpen (Registax) → Final adjustments (optional)
Want a full walkthrough with settings? Our Astrophotography Made Easy course covers the complete capture-to-final-image workflow for planetary cameras.
Want the full capture-to-stack-to-sharpen workflow? Astrophotography Made Easy walks through settings, gear, and processing for planetary cameras.
NexImage 10 Frame Rates by Resolution
Frame rate matters for lucky imaging - more frames mean more chances to catch a sharp moment through the atmospheric turbulence. Here is what the NexImage 10 delivers at 12-bit ADC:
| Resolution | FPS (12-bit) | Typical Use |
|---|---|---|
| 3856 × 2764 (full) | 6.85 | Lunar mosaics |
| 2560 × 1920 | 14.34 | Large lunar regions |
| 2048 × 1536 | 21.74 | Moon, Sun |
| 1920 × 1080 | 31.70 | Wide planetary field |
| 1600 × 1200 | 34.17 | Wide planetary field |
| 1280 × 960 | 50.96 | Planetary - good balance |
| 1280 × 720 | 65.11 | Planetary |
| 1024 × 768 | 64.59 | Planetary |
| 640 × 480 | 94.4 | Planetary sweet spot |
For planetary imaging, you will spend most of your time at 640×480 or 1280×960. The planet fills only a small portion of the full sensor, so cropping to a tight ROI around the target gives you dramatically higher frame rates without losing any useful data.
NexImage 10 vs NexImage 5 vs ZWO ASI224MC: Which Should You Buy?
This is the comparison every buyer researches. The NexImage 5 is Celestron's entry-level planetary camera, the NexImage 10 is the step-up, and the ZWO ASI224MC is the community favorite at a similar price.
| Feature | NexImage 5 | NexImage 10 | ZWO ASI224MC |
|---|---|---|---|
| Sensor | ON Semi MT9P031 | ON Semi MT9J003 | Sony IMX224 |
| Resolution | 5MP (2592×1944) | 10.7MP (3856×2764) | 1.2MP (1304×976) |
| Pixel Size | 2.2µm | 1.67µm | 3.75µm |
| Sensor Size | 5.7×4.3mm (1/2.5") | 6.4×4.6mm (1/2.3") | 4.9×3.7mm (1/3") |
| ADC | 12-bit | 12-bit | 12-bit |
| USB | 2.0 | 3.0 | 3.0 |
| Read Noise | Not published | Not published | 1.0e (very low) |
| Max FPS (640×480) | ~15 fps | 94 fps | 150 fps |
| Body | Plastic | Aluminum | Aluminum |
| Mounting | 1.25" nosepiece | 1.25" nosepiece + C-thread | 1.25" nosepiece + CS-mount + C-mount |
| Software | iCap | iCap | ASIStudio, ASICAP (+ FireCapture, SharpCap) |
| Street Price | ~$100 | ~$250 | ~$200–250 |
Celestron NexImage 5
Cheaper and simpler, but USB 2.0 and lower frame rates make it less capable than the NexImage 10.
View NexImage 5 →Where the NexImage 10 wins:
- Resolution. 10.7MP vs the ASI224MC's 1.2MP means dramatically more data per frame. For lunar mosaics, this is a real advantage - you cover more of the Moon per capture.
- Plug-and-play simplicity. Screw on the nosepiece, plug in USB, open iCap. Celestron's ecosystem is more approachable for true beginners.
- C-thread compatibility. Connects directly to C-mount optics and Celestron's own accessories without adapters.
Where the ZWO ASI224MC wins:
- Read noise. The Sony IMX224 sensor has a published read noise of ~1.0 electron - exceptionally low. This means cleaner frames, especially at low signal levels. Celestron does not publish read noise for the MT9J003 sensor, and community consensus is that it is noticeably higher.
- Pixel size for planetary work. The ASI224MC's larger 3.75µm pixels are better matched to typical telescope focal lengths (f/10 to f/20) for planetary imaging without extreme oversampling. The NexImage 10's 1.67µm pixels often need a Barlow to reach optimal sampling.
- Frame rate. 150 fps at 640×480 vs 94 fps - more frames in the same window means more sharp frames to stack.
- Software ecosystem. ZWO's ASIStudio is polished, and the camera is natively supported by FireCapture, SharpCap, and virtually every astronomy capture program.
- Build quality. Full aluminum body with more robust mounting options (CS-mount, C-mount, 1.25" nosepiece).
- Community support. The vast majority of planetary imagers on Cloudy Nights and other forums use ZWO cameras, so troubleshooting help and processing tips are abundant.
- Deep-sky potential. The ASI224MC's larger pixels and lower noise make it marginally usable for EAA (Electronically Assisted Astronomy) on brighter deep-sky objects - something the NexImage 10 cannot do.
The verdict:
If you already own a Celestron telescope and want the simplest possible entry into planetary imaging, the NexImage 10 is a solid choice. It produces good results on the Moon and bright planets, and the higher resolution is genuinely useful for lunar work.
If you want the best planetary camera in this price range regardless of brand, the ZWO ASI224MC is the stronger option. Lower read noise, better pixel matching for planetary focal ratios, higher frame rates, superior software support, and a much larger user community for troubleshooting. At a similar or slightly lower price, it is hard to justify the NexImage 10 on pure performance.
For our broader comparison of telescope eyepiece cameras, see our dedicated roundup.
Which Telescopes Pair Best with the NexImage 10?
Matching camera pixel size to telescope focal length is critical for planetary imaging. The NexImage 10's 1.67µm pixels mean you need long focal lengths - ideally 2,000mm+ native, or shorter with a Barlow.
Best pairings:
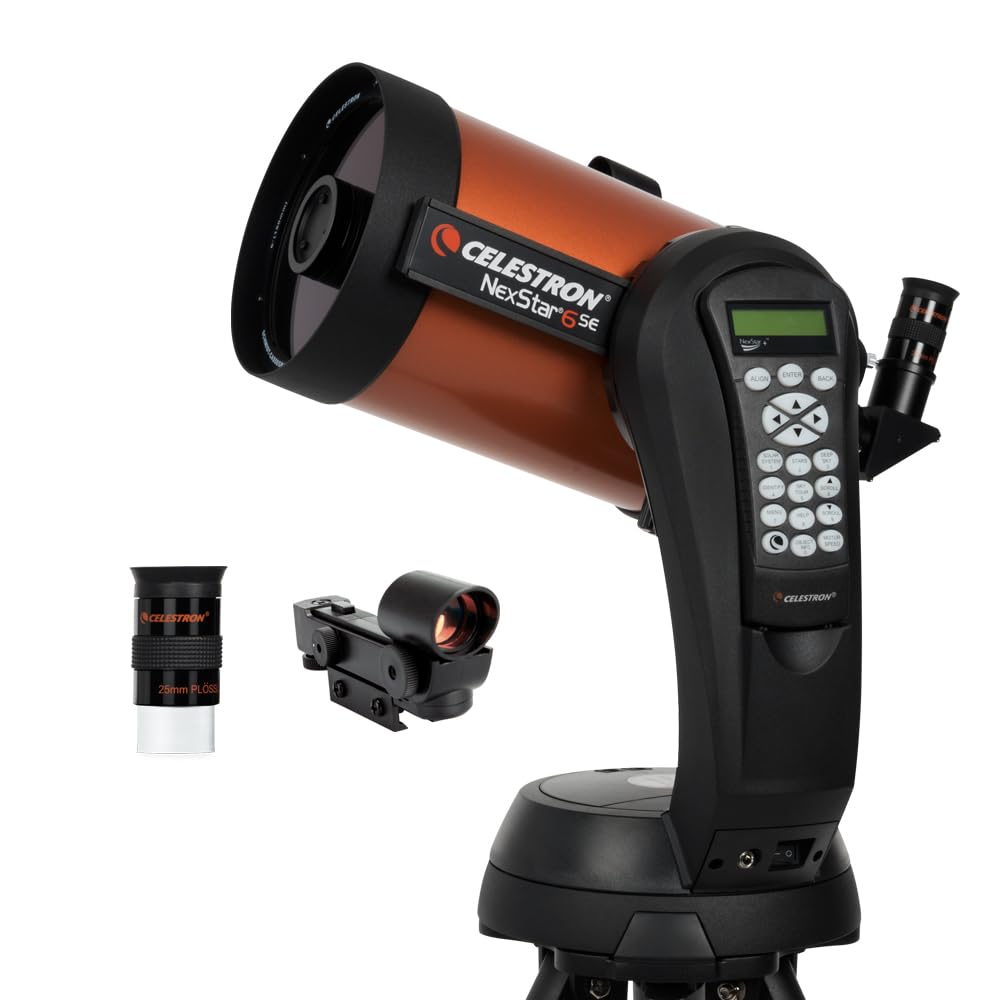
Celestron NexStar 6SE
A strong match for the NexImage 10 with long focal length, tracking, and enough aperture for Jupiter and Saturn.
View NexStar 6SE →
Celestron NexStar 8SE
More aperture and the same long SCT focal length: the strongest NexStar pairing discussed in this review.
View NexStar 8SE →- Celestron NexStar 6SE + 2x Barlow - effective 3,000mm f/20. This is the sweet spot for Jupiter and Saturn. The 6SE's GoTo tracking keeps the planet centered while you record.
- Celestron NexStar 8SE + 2x Barlow - effective 4,064mm f/20. More light-gathering for dimmer targets like Mars or Uranus. The best all-round pairing in the NexStar line.
- Celestron CPC 800 - same optics as the 8SE on a sturdier mount with better tracking. Excellent for sustained planetary imaging sessions.
- Any 6"+ Schmidt-Cassegrain or Maksutov-Cassegrain - the SCT design with its long native focal length is a natural match for this camera's small pixels.
Acceptable pairings:
- Celestron NexStar 5SE + 2x Barlow - works for the Moon and Jupiter/Saturn but the 5" aperture limits resolution on smaller targets.
- 6" or 8" Dobsonian - optically capable but manual tracking makes keeping a planet in the tiny field of view challenging. A motorized Dob or tracking platform helps.
Poor pairings:
- Short focal length refractors (400–600mm) - the image scale is too coarse at these focal lengths for the NexImage 10's pixels. Planets appear tiny and undersampled. A refractor works better with a larger-pixel camera like the ZWO ASI224MC.
- Small aperture telescopes (60–70mm) - not enough resolution to feed a 10.7MP sensor with meaningful detail. See our guide on what a 60mm telescope can show.
Is the NexImage 10 Easy to Use for a Beginner?
Yes - the NexImage 10 is one of the most beginner-friendly planetary cameras available. Physical setup is genuinely plug-and-play: screw on the nosepiece, insert into the focuser, connect USB. iCap walks you through capture basics.
The learning curve is not in the camera - it is in the planetary imaging technique itself. Lucky imaging (shooting video, stacking, processing) is a multi-step workflow that takes practice. Expect your first few sessions to produce mediocre results as you learn to:
- Focus precisely (critical - even slight misfocus ruins planetary detail)
- Set exposure and gain for the right brightness balance
- Record long enough captures (60–120 seconds) for sufficient frame count
- Process with AutoStakkert and Registax effectively
This is true of any planetary camera, not just the NexImage 10. The camera itself does not make the process harder or easier than alternatives.
If you are brand new to astrophotography, our Astrophotography Made Easy course walks through each step from first light to final image. For getting started with visual observation first, see our Stargazing 101 guide.
Software Compatibility: Mac and Windows
The NexImage 10 works on both macOS and Windows via Celestron's iCap software. The CD in the box is almost certainly outdated - download the latest version directly from Celestron's support page.
Windows
iCap, FireCapture, and SharpCap all support the NexImage 10 natively on Windows. Install the Celestron camera driver from their website first, then open your preferred capture software. FireCapture is the community recommendation for planetary work.
macOS
iCap has a Mac version. For a lighter alternative, oaCapture (free, open-source) works well and is preferred by many Mac users. Lynkeos is another free option for capture and processing on Mac.
Processing software (cross-platform):
- AutoStakkert!3 - Windows only (runs well under Wine/Parallels on Mac). The stacking standard.
- Registax 6 - Windows only. Wavelet sharpening tool.
- PIPP (Planetary Imaging Pre-Processor) - Windows only. Useful for centering and cropping video files before stacking.
The Windows processing pipeline (FireCapture → PIPP → AutoStakkert → Registax) is significantly more mature than the Mac ecosystem for planetary imaging. If you are serious about planetary work, a Windows laptop (even a cheap one dedicated to imaging) is worth considering.
🌌 Get Weekly Stargazing Tips
Join 960+ astronomers. Gear reviews, sky guides, and no spam.
Pros and Cons of the Celestron NexImage 10
What we like
- High resolution (10.7MP) makes it excellent for lunar imaging and mosaics - a clear advantage over 1–2MP planetary cameras.
- USB 3.0 is a major upgrade from the NexImage 5's USB 2.0, enabling dramatically higher frame rates.
- 12-bit ADC provides good dynamic range for capturing detail in both bright and shadow regions of planetary targets.
- Simple 1.25" nosepiece means zero adapters needed for most telescopes. Fits the same port as your eyepieces.
- Built-in IR cutoff filter eliminates the need for a separate IR-block filter (which you would need with most ZWO cameras if you want accurate color).
- Aluminum body is a step up from the plastic NexImage 5.
- Price point is accessible for beginners testing whether planetary imaging is for them.
What we don't like
- 1.67µm pixels are very small - they require long focal lengths (2,000mm+, ideally with a Barlow) to reach optimal sampling for planets. On shorter focal length scopes, you are oversampled and wasting resolution.
- No published read noise specification. Community testing suggests it is significantly higher than the ZWO ASI224MC's 1.0e, which means noisier individual frames.
- Rolling shutter (not global). Fast-moving targets or poor tracking can introduce slight frame distortion. Not a dealbreaker for lucky imaging where you stack many frames, but global shutter (as on the ZWO ASI174MM) is technically superior.
- iCap software is basic. FireCapture is free and better in every way - most users switch immediately.
- Limited community support. The vast majority of planetary imagers use ZWO cameras, so most tutorials, processing tips, and troubleshooting advice are ZWO-centric.
- No deep-sky capability. This is strictly a solar system camera - no EAA, no nebula, no galaxies, even short-exposure.
- No cooled sensor. Thermal noise increases during extended sessions in warm weather. Not a major issue for short planetary captures, but limits any creative use for longer exposures.
Is the Celestron NexImage 10 Worth Buying?
The NexImage 10 is a good budget planetary camera for beginners who want to stay within the Celestron ecosystem and value plug-and-play simplicity. It produces good results on the Moon and bright planets when paired with the right telescope and a proper stacking workflow.
However, at the same price point, the ZWO ASI224MC offers lower noise, better pixel matching for typical planetary setups, higher frame rates, and vastly superior software and community support. If you are buying your first planetary camera today and are willing to spend 30 minutes learning FireCapture, the ZWO is the better investment.
Buy the NexImage 10 if:
- You own a Celestron scope and want the simplest possible setup
- Lunar imaging is your primary interest (the 10.7MP resolution excels here)
- You prefer Celestron's bundled software and support ecosystem
- You found it on sale below the ZWO ASI224MC's price
Buy the ZWO ASI224MC instead if:
- Planetary imaging is your primary goal
- You want the camera with the best noise performance in this price range
- You may want to experiment with EAA or brighter deep-sky targets later
- You are comfortable with third-party capture software (FireCapture, SharpCap)
For a broader look at planetary camera options, see our telescope eyepiece cameras roundup. If you haven't chosen your telescope yet, our best telescopes for beginners and best computerized telescopes lists are good starting points.
Frequently Asked Questions
What is the Celestron NexImage 10 used for?
The NexImage 10 is a 10.7-megapixel color CMOS camera designed for imaging the Moon, planets (Jupiter, Saturn, Mars, Venus), and the Sun (with a proper solar filter). It is a solar system camera only - not for deep-sky objects like galaxies or nebulae.
Is the Celestron NexImage 10 compatible with my telescope?
Yes, if your telescope accepts standard 1.25-inch eyepieces. The camera slides into the focuser the same way an eyepiece does. It also has a C-thread mount for connecting to C-mount optics. It is compatible with Schmidt-Cassegrains, refractors, reflectors, and Maksutov-Cassegrains.
Does the NexImage 10 work on Mac?
Yes. Celestron's iCap software has a macOS version. The free oaCapture and Lynkeos are alternative capture and processing options for Mac. The stacking software AutoStakkert and Registax are Windows-only but run under Wine or Parallels on Mac.
What is lucky imaging and why does the NexImage 10 need it?
Lucky imaging is the technique of shooting high-frame-rate video of a planet, then using software (AutoStakkert) to select and stack only the sharpest frames. Atmospheric turbulence distorts the image constantly - lucky imaging grabs the moments when the atmosphere is briefly steady. Every planetary camera requires this workflow; it is not a limitation of the NexImage 10 specifically.
What frame rate does the NexImage 10 achieve?
At the most common planetary resolution of 640×480 pixels, the NexImage 10 captures 94 frames per second via USB 3.0 with 12-bit ADC. At full 10.7MP resolution (3856×2764), it captures 6.85 fps - useful for the Moon but too slow for planetary lucky imaging.
NexImage 10 vs NexImage 5: what's the difference?
The NexImage 10 has a higher-resolution sensor (10.7MP vs 5MP), smaller pixels (1.67µm vs 2.2µm), USB 3.0 vs USB 2.0 (dramatically faster data transfer), and an aluminum body vs plastic. The NexImage 5 is roughly half the price and remains a good entry point, but the USB 3.0 upgrade alone makes the NexImage 10 a worthwhile step up for serious planetary work.
NexImage 10 vs ZWO ASI224MC: which is better?
For pure planetary imaging performance, the ZWO ASI224MC is the stronger camera. It has lower read noise (1.0e vs unpublished), larger pixels better matched to typical telescope focal ratios (3.75µm vs 1.67µm), higher frame rates (150 fps vs 94 fps at 640×480), and superior software support. The NexImage 10's advantage is its higher resolution for lunar imaging and simpler Celestron-ecosystem setup.
What Barlow lens should I use with the NexImage 10?
A 2x Barlow lens is the most versatile choice. On an f/10 Schmidt-Cassegrain, it doubles the effective focal length and brings the image scale into the optimal range for the NexImage 10's small pixels. A 3x Barlow is useful for very high-resolution work on the Moon and Jupiter, but requires excellent atmospheric seeing. Quality matters - a cheap Barlow degrades the image more than it magnifies it.
Can the NexImage 10 image deep-sky objects?
No. The NexImage 10 lacks the sensitivity, exposure length, and thermal management needed for deep-sky imaging. Galaxies, nebulae, and star clusters require cameras with larger pixels, lower noise, and often active cooling - plus an equatorial mount for long tracked exposures. See our beginner astrophotography equipment guide for deep-sky options.
Do I need a laptop to use the NexImage 10?
Yes. The NexImage 10 requires a connected computer (laptop or desktop) running capture software - there is no standalone recording mode. A USB 3.0 port is strongly recommended. For field use, a Windows laptop with an SSD (for fast write speeds during video capture) is the standard setup.
Does the NexImage 10 work in light-polluted areas?
Yes. Light pollution has minimal impact on planetary imaging because the targets (Moon, planets, Sun) are already extremely bright. The camera works equally well from urban backyards and dark sky sites. This is one of the advantages of planetary imaging over deep-sky work - you don't need to drive to dark skies. See our guide on using a telescope in the city.
Capture your first planetary image this week. Our Astrophotography Made Easy course covers settings, gear, and processing for every camera type - $27 with a 30-day money-back guarantee.
Join 960+ astronomers in our free weekly newsletter for gear reviews, observing tips, and exclusive deals. Subscribe here.
Related Articles
- 11 Top Telescope Eyepiece Cameras (Ranked)
- Celestron NexStar 6SE Review
- Astrophotography with the Celestron 8SE
- How to Photograph the Moon with a Telescope
- How to Do Astrophotography (Start-to-Finish Guide)
- Beginner Astrophotography Equipment
- Best Telescopes to See Planets
- How to Attach a Camera to a Telescope
Make the camera useful after checkout Astrophotography Made Easy covers the basic capture and stacking workflow behind sharper Moon and planet images.